Background
I have a laptop and a mobile device. It will be very convenient if I can send the page URL from my laptop to my mobile device so I can continue to browse it on my mobile device. I know many browsers allow you to send the tab over to another the mobile device now, but I think it's easier to just show a QR code and scan it with your mobile device. It doesn't require any setup and mobile devices that are not belong to you can use it also.
What is the plan?
Make a Chrome extension that add a button to the browser toolbar to show the QR code with the URL of the active tab.
How to start?
Installed these tools on your machine.
- Node.js + NPM
- Visual Studio Code (or any IDE you prefer)
I will use Typescript + Webpack in the project.
What to do?
- Create a new directory and open it with Visual Studio Code .
- Create a file named manifest.json . This file describes your Chrome extension.
- Put in the following contents:
{
    "name": "Current page URL to QR code",
    "version": "1.0",
    "description": "Generate QR code from current URL",
    "manifest_version": 2,
    "permissions": [
        "declarativeContent",
        "activeTab"
    ],
    "background": {
        "scripts": [
            "dist/background.js"
        ],
        "persistent": false
    },
    "page_action": {
        "default_popup": "dist/popup.html",
        "default_icons": {
            "128": "images/qr-code.png"
        }
    },
    "icons": {
        "128": "images/qr-code.png"
    }
}
- name : Name of your Chrome extension.
- version : Version of your Chrome extension.
- description : Description for your Chrome extension.
- manifest_version : Version of the manifest file. Must be 2.
-
permissions
: Permissions required for your Chrome extension.
- declarativeContent : We need this to show the popup button in the browser toolbar.
- tabs : We need this to access the URL of the active tab.
-
background
: Background script for your Chrome extension.
- scripts : URL to the background script.
- persistent : False to make it non-persistent in the background. Recommended to be false.
-
page_action
: Page action for your Chrome extension.
- default_popup : Popup to show when the popup button is clicked.
- default_icons : Icon for the popup button. I only use a 128x128 PNG image here.
- icons : Icons for your Chrome extension
- Create a file named package.json . This file contains the Javascript dependencies required by your project.
- Put a empty JSON object in it. We will use npm to add dependencies later.
{}
- Create a file named tsconfig.json . We will use Typescript to write our codes. This is the configuration file for Typescript compiler.
- Put in the following contents:
{
    "compilerOptions": {
        "sourceMap": true,
        "target": "ES6",
        "outDir": "./dist"
    }
}
- sourceMap : True to generate source map so we can see the Typescript source code when debugging in Chrome.
- target : Tell the compiler to output ES6 compatible Javascript.
- outDir : Generate the output files in ./dist directory. The source code is located in ./src directory.
- Open a terminal window in Visual Studio Code (Ctrl+`) and type this command to install the required dependencies for development work:
npm install --save-dev @types/chrome webpack webpack-cli typescript ts-loader html-webpack-plugin
- @types/chrome : Typescript definition file to use Chrome APIs.
- webpack : Webpack.
- webpack-cli : CLI for Webpack.
- typescript : Typescript compiler.
- ts-loader : Webpack plugin to compile Typescript files.
- html-webpack-plugin : Webpack plugin to compile HTML files.
- Create a file named webpack.config.js . This is the configuration file the Webpack compiler.
- Put in the following contents:
const path = require('path');
const HtmlWebpackPlugin = require('html-webpack-plugin');

module.exports = {
    entry: {
        background: './src/background.ts',
        popup: './src/popup.ts',
    },
    output: {
        filename: '[name].js',
        path: path.resolve(__dirname, 'dist'),
    },
    plugins: [
        new HtmlWebpackPlugin({
            filename: 'popup.html',
            template: 'src/popup.html',
            chunks: ['popup'],
        })
    ],
    resolve: {
        extensions: [".ts", ".tsx", ".js"]
    },
    module: {
        rules: [
            { test: /\.tsx?$/, loader: "ts-loader" }
        ]
    }
};
- entry : Entry points of the project. We generate a background script and a script file for popup.html here.
- output : The output configuration for the Webpack compiler. We generate the output in ./dist directory and name them according to the entry names.
- plugins : The plugin configurations for the Webpack compiler. We generate the popup.html using HtmlWebpackPlugin and include only the popup.js .
- resolve : To support non-Javascript files.
- module : Processing rules for loader module. We enable the ts-loader module here to compile the Typescript files.
- Create a file named background.ts in . /src directory. The Webpack compiler will generate background.js in ./dist directory.
- Put in the following contents:
chrome.declarativeContent.onPageChanged.removeRules(undefined, () => {
    chrome.declarativeContent.onPageChanged.addRules([{
        conditions: [new chrome.declarativeContent.PageStateMatcher({
            pageUrl: { urlMatches: '.' }
        })],
        actions: [new chrome.declarativeContent.ShowPageAction()]
    }]);
});
- This script will enable showing the popup button in the toolbar for all websites.
- It uses chrome.declarativeContent API, thus it requires the declarativeContent permission as specified in manifest.json .
- Create a file named popup.html in ./src directory. The Webpack compiler will generate popup.html in ./dist directory.
- Put in the following contents:
<style>
    canvas {
        width: 450px !important;
        height: 450px !important;
    }
</style>
<canvas id="canvas" width="450" height="450"></canvas>
<div style="text-align:center">Powered by <a href="https://github.com/soldair/node-qrcode">soldair/node-qrcode</a></div>
- This will just show a canvas with specified size. We will generate the QR code from popup.js and put it in the canvas.
- The HtmlWebpackPlugin will insert the script tag automatically to include popup.js .
- Create a file named popup.ts in ./src directory. The Webpack compiler will generate popup.js in ./dist directory.
- Before we start coding in popup.ts , we need to install the library required to generate the QR code.
- Open a terminal window in Visual Studio Code (Ctrl+`) and type these commands to install qrcode NPM module:
npm install qrcode
npm install --save-dev @types/qrcode
- qrcode : The library to generate QR code.
- @types/chrome : Typescript definition file for qrcode library.
- Put in the following contents:
import * as QRCode from 'qrcode';

chrome.tabs.query({
    active: true,
    currentWindow: true
}, tabs => {
    let tab = tabs.pop();
    if (tab) {
        QRCode.toCanvas(document.getElementById('canvas'), tab.url, { width: 450 });
    }
});
- This script will get the URL of the active and generate a QR code into the canvas in popup.html .
- It uses tabs.Tab.url API but only for active tab, thus it requires the activeTabs permission as specified in manifest.json .
- Open a terminal window in Visual Studio Code (Ctrl+`) and type this command to build the project:
npx webpack --build
- You should see ./dist directory is created.
How to test it?
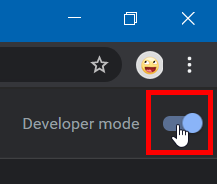
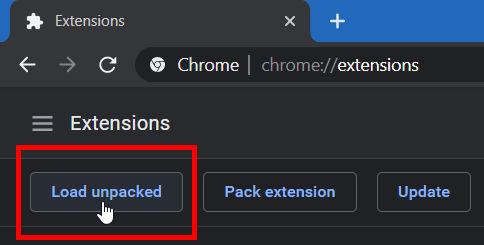
- Open Chrome and navigate to chrome://extensions/ .
- Turn on 'Developer mode'.
- Click 'Load unpacked' and select your project directory to load your project as Chrome extension.
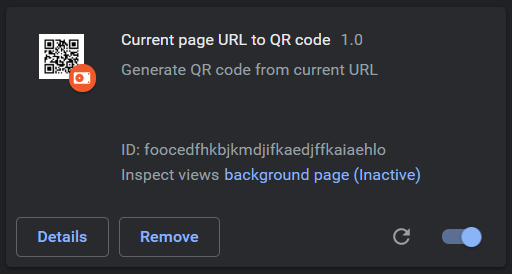
- You should see your extension appears in the list.
- Open any website and you should see your button in the toolbar.
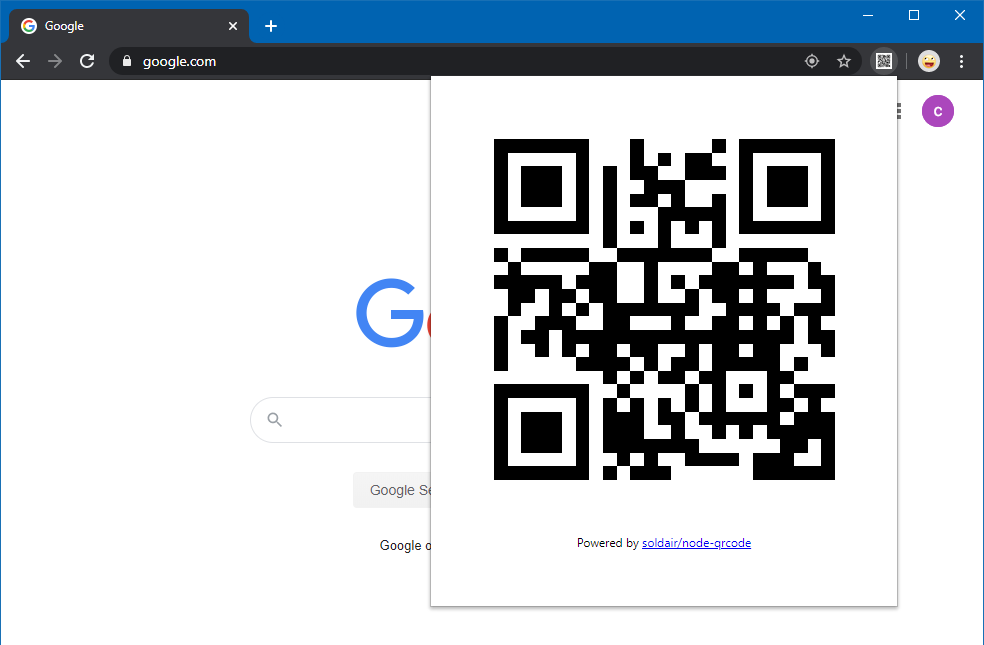
- You can see the sample on Chrome web store .
- Source code is here: https://github.com/chimin/chrome-extension-qrcode