This is continued from Make a note taking app with Firestore - Part 1 Google authentication
What is Markdown ?
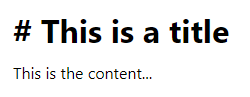
When you type this
# This is a title

This is the content...
It will be displayed as
So you can have a rich text content without knowing complex HTML. It's much better and simpler than all the HTML rich text editor out there, which is based on HTML.
What to do?
1. Install the Markdown Editor library
Run these commands:
npm i simplemde
npm i -D @types/simplemde
This will install the simplemde library and the type definitions for Typescript into your project. Next we will update the HomePanel so it display a header panel and a editor area. Replace ./src/components/HomePanel.tsx with these:
import './HomePanel.css';

import React from 'react';

import EditPanel from './EditPanel';
import ProfilePanel from './ProfilePanel';

const HomePanel = () => {
    return (
        <div>
            <div className="content-panel">
                <EditPanel />
            </div>
            <div className="topbar">
                <div className="container">
                    <div className="title">Write it down</div>
                    <ProfilePanel />
                </div>
            </div>
        </div>
    );
};

export default HomePanel;
Then we have to style it so the header panel is at the top and the editor will fill the remaining area. Create ./src/components/HomePanel.css and put these in:
.topbar {
    position: fixed;
    left: 0;
    top: 0;
    right: 0;
    background: #ddd;
    height: 2.5em;
}

.topbar>.container {
    position: absolute;
    top: 50%;
    width: 100%;
    transform: translate(0, -50%);
}

.topbar .title {
    display: inline-block;
    padding: .5em;
    font-weight: bold;
    text-transform: capitalize;
}

.content-panel {
    position: fixed;
    left: 0;
    top: 2.5em;
    right: 0;
    bottom: 0;
}
Next we will add the ProfilePanel, which will show the logged in user name and a logout button. Create ./src/components/ProfilePanel.tsx and put these in:
import './ProfilePanel.css';

import React, { useContext } from 'react';

import LoggedInContext from '../contexts/LoggedInContext';

const ProfilePanel = () => {
    const loggedIn = useContext(LoggedInContext);

    return (
        <div className="profile-panel">
            <span className="greeting">Welcome, <span className="username">{loggedIn.user?.displayName}</span></span>
            <button type="button" onClick={loggedIn.clear}>Logout</button>
        </div>
    );
};

export default ProfilePanel;
Then we add some stylings to it so it's displayed nicely. Create ./src/components/ProfilePanel.css and put these in:
.profile-panel {
    display: inline-block;
    position: absolute;
    right: 0;
    padding: .5em;
}

.profile-panel>.username {
    font-weight: bold;
}

.profile-panel>button {
    margin-left: .5em;
}
Next we will display the Markdown Editor using simplemde library. Create ./src/components/EditPanel.tsx and put these in:
import '../../node_modules/simplemde/debug/simplemde.css';
import './EditPanel.css';

import React, { useEffect, useRef } from 'react';
import SimpleMDE from 'simplemde';

const EditPanel = () => {
    const ref = useRef<HTMLTextAreaElement>(null);

    useEffect(() => {
        const editor = new SimpleMDE({
            element: ref.current!,
            autofocus: true,
            toolbar: false,
            status: false,
        });

        return () => {
            editor.toTextArea();
        };
    });

    return (
        <div className="edit-panel">
            <textarea ref={ref}></textarea>
        </div>
    );
};

export default EditPanel;
Then we add some styling to it and the editor will fill the container area. Create ./src/components/EditPanel.css and put these in:
.edit-panel {
    width: 100%;
    height: 100%;
}

.edit-panel>.CodeMirror {
    width: 100%;
    height: 100%;
}
Now it's done. You can run this command to test everything:
npm start
Next we will do Make a note taking app with Firestore - Part 1.3 Firestore