Background
I want a web server.
What we need?
- A subnet with CIDR block of 10.0.0.0/24 so my web server instances will always fall in a predefined range, then I can safely assume all traffic that comes from 10.0.0.0/24 is from my internal network. It's very useful if we have multiple server instances.
- An internet gateway so my web server instance can be exposed to the world.
- A security group so only certain ports are exposed to the world.
- A EC2 instance which is hosting my web server.
How to do it?
This is what we are going to do:
We will use CloudFormation to do it. Create a 01-webserver-template.yaml file with these contents:
AWSTemplateFormatVersion: 2010-09-09
Resources:
Parameters:
Outputs:
This is the basic structure of a CloudFormation file. It can be a JSON file or a YAML file. I'm using YAML format here.
Network
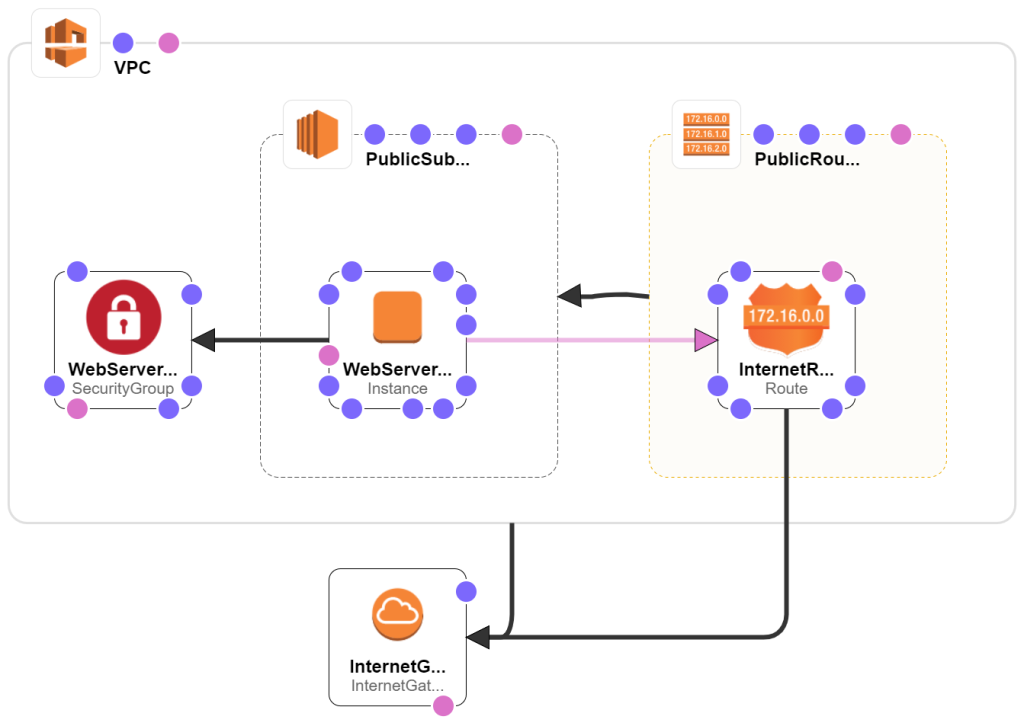
First we setup the VPC for our web servers. Add these to the Resources section:
| 1 |
InternetGateway:
|
This is the Internet gateway. It's needed so our web server can be accessible from the Internet. |
| 2 |
VPC:
|
This is the VPC. The CidrBlock will be 10.0.0.0/16 so we can add subnet with CidrBlock 10.0.0.0/24 later. |
| 3 |
VPCInternetGatewayAttachment:
|
This is attached the Internet gateway to the VPC. |
| 4 |
PublicSubnet:
|
This is the subnet. The server instances in this subnet will have the IP of 10.0.0.*. |
| 5 |
PublicRouteTable:
|
This is the route table. It determines the destination of the traffic, for example any traffic targeting 10.0.*.* should go to the server instances within the VPC. |
| 6 |
PublicSubnetRouteTableAssociation:
|
Associate the route table to the subnet. |
| 7 |
InternetRoute:
|
This is the route for the Internet. Any traffic that isn't targetting 10.0.*.* will go to the Internet, as determined by the DestinationCidrBlock of 0.0.0.0/0. |
Web server
Next we setup the EC2 instances to run a web server. Add these to the Resources section:
| 1 |
WebServerSecurityGroup:
|
This is the security group for our web server. It's a Firewall that decide what ports are exposed to the public. |
SecurityGroupIngress:
|
We needs the port 80 for the web server. | |
- IpProtocol: TCP
|
The port 22 is for the SSH access. SSH is optional but it's useful in case you want to troubleshoot the EC2 instance. The security group only allows the traffic from with IP of SshAllowCidrIp. The parameter will be defined later. | |
| 2 |
WebServerInstance:
|
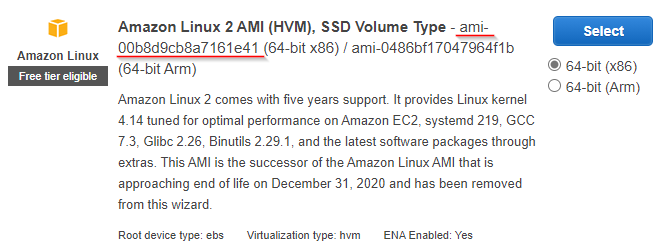
This is the EC2 instance to run the web server. The ImageId here refers to the Amazon Linux AMI in
ap-southeast region. Each region has a different ID for the AMI. You can find it when you launching a new
instance from the AWS console.
|
InstanceType: t2.micro |
We use t2.micro here because it's entitled to the free tier. | |
NetworkInterfaces:
|
This is the network interface of the EC2 instance. It's in the subnet we defined earlier so it will have the IP of 10.0.0.*. It will also have a public IP. | |
GroupSet:
|
Associate it to the security group we defined earlier so we only expose the ports we need. | |
KeyName: !Sub ${SshKeyName} |
Set the private key required to access the EC2 instance via SSH. The parameter will defined later. | |
UserData: !Base64 |
|
This is the shell script that will be executed when the EC2 instance if first created. It will install the required package to run a NGINX web server. The property expects a base64 encoded string so we need to use the AWS intrinsic function Base64 to encode it. | |
DependsOn: InternetRoute |
The EC2 instance required the Internet route to be created. AWS will automatically figure out the dependencies if we use !Ref to reference the component but this InternetRoute is not referenced with !Ref anywhere, so we need to manually declare the dependency here. |
Parameters
Add these to the Parameters section:
| 1 |
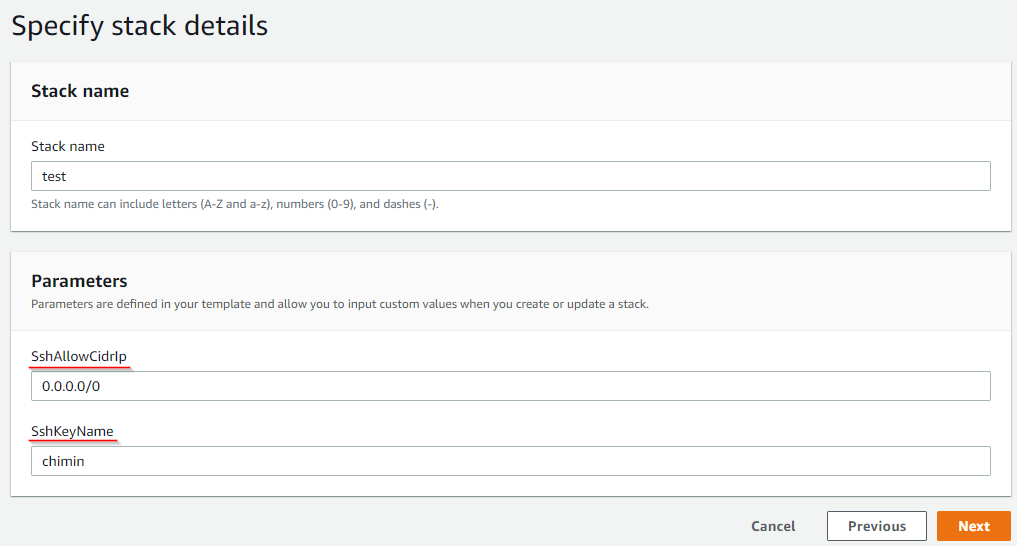
SshAllowCidrIp:
|
This is the IP that is allowed to SSH into our web server instance. Default to allow all. |
| 2 |
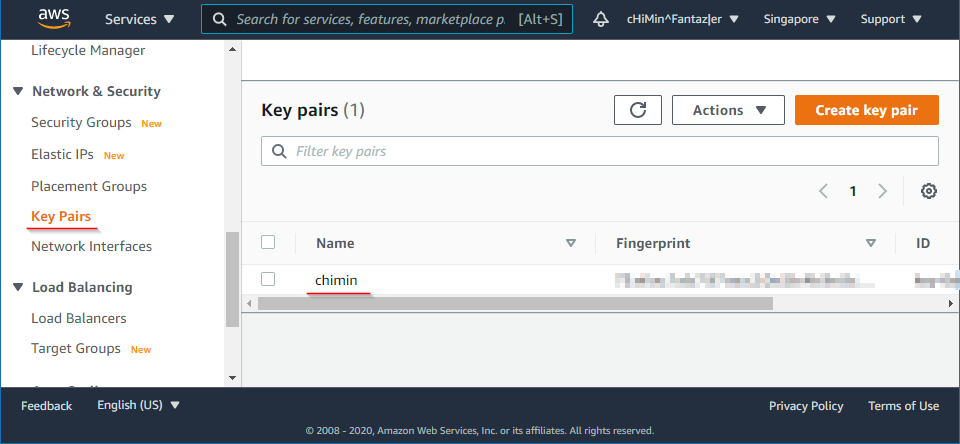
SshKeyName:
|
This is the private key needed to SSH into our web server instance. You can create one in EC2 > Network
& Security > Key Pairs page:
|
The AWS console will prompt you the parameter when you upload your template:
Output
After provision all the components, we want to have the public IP of the web server instance so we can access it from the Internet. CloudFormation allows us to bind the properties of a component as an output so we don't have to dig inside the components to find it. Add these to the Output section:
| 1 |
Url:
|
This will construct a HTTP URL from the IP of the web server instance. |
The AWS console will show all the outputs here:
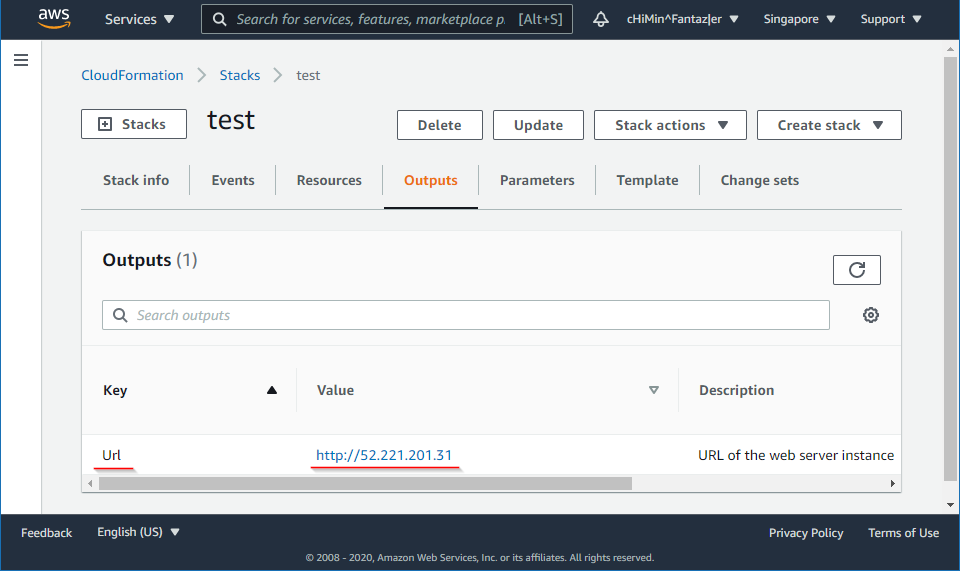
Open the URL in a browser and you should see the NGINX welcome page. It might takes a while for the page to work because it takes time to spin up an EC2 instance.
You can delete the stack after you done playing with it. It will delete all the resources belong to this CloudFormation stack. Squishy clean.
Next we will do AWS CloudFormation: 02 - Create an auto scaling group .