This is continue from part 2 .
Browser Application - Video Call
1. Design the UI for Video Call
We will use MediaDevices.getUserMedia() to get the webcam video stream. Then we will use the RTCPeerConnection to stream it to another user. All these are built-in functions of the browser. Such convenient.
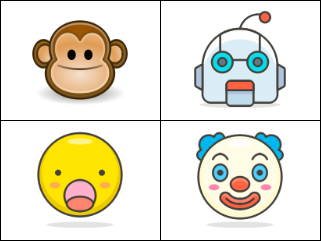
The web application will show the participant face as big as possible. It will use the whole browser area to show all the videos. It will divide the browser area into a grid and each video will be in its own box. For example if there's 4 people in the room:
Open ./src/app/app.component.html in your editor and replace the <!-- TODO video panel --> with these:
    <div class="video-panel" [style.grid-template-columns]="videoColumns">
        <div *ngFor="let video of videos | keyvalue">
            <video (loadedmetadata)="playVideo($event, video.key)" [srcObject]="video.value"></video>
            <span>{{video.key}}</span>
        </div>
    </div>
We will need to write some CSS to achieve the grid layout. Open ./src/app/app.component.css in your editor and add these:
.video-panel {
    position: absolute;
    top: 0;
    left: 0;
    width: 100%;
    height: 100%;
    display: grid;
    grid-gap: 2px;
}
.video-panel>div {
    position: relative;
}
.video-panel>div>span {
    position: absolute;
    top: 2px;
    left: 2px;
    padding: 2px;
    background: rgba(255, 255, 255, .5);
}
video {
    width: 100%;
    height: 100%;
}
The number of participants in the room is dynamic, so we will not able to define the number of columns in the CSS. We will need to write some code to make the grid layout works for dynamic number of participants. Open ./src/app/app.component.ts in your editor and add a doLayout function:
  videos: { [target: string]: MediaStream } = {};
  videoColumns = '';

  doLayout() {
    const videoCount = Object.keys(this.videos).length;
    const columnCount = videoCount ? Math.ceil(Math.sqrt(videoCount)) : 0;
    this.videoColumns = '';
    for (let i = 0; i < columnCount; i++) {
      this.videoColumns += 'auto ';
    }
  }
Since we use CSS grid layout here, so we will be able to control the number of columns by manipulating the grid-template-columns style attribute, which is bound to the videoColumns field. This function will recalculate the number of columns when invoked.
We want the video to start playing immediately after the video stream is assigned to it. We already bind the loadedmetadate event to the playVideo function in the .html file. Now open ./src/app/app.component.ts file in your editor and add a playVideo function:
  playVideo(event: Event, target: string) {
    const videoElement = event.target as HTMLVideoElement;
    videoElement.muted = target == this.me;
    videoElement.play();
  }
This function will only enable the audio from other participants. Lastly we will write some more CSS for other components. Add these to the ./src/app/app.component.css file:
.info-panel {
    position: fixed;
    bottom: 5px;
    left: 5px;
    padding: 2px;
    background: rgba(255, 255, 255, .5);
}

.message-panel {
    position: fixed;
    bottom: 5px;
    right: 5px;
    text-align: right;
}
.message-list>div {
    margin-bottom: 5px;
}
.message-list>div>span {
    padding: 2px;
    background: rgba(255, 255, 255, .5);
    border-radius: 2px;
}
This will move the room information to the bottom left corner and the message chat box to the bottom right corner.
2. Write the logic to initiate the video call
We will initiate the video call when we got the participant list from the server. Now open ./src/app/app.component.ts file in your editor and replace the processParticipantList function to this:
  private me: string;

  private async processParticipantList(message: { you: string, all: string[]; }) {
    this.me = message.you;
    this.videos[this.me] = await navigator.mediaDevices.getUserMedia({ video: true, audio: true });
    this.doLayout();
    message.all.filter(t => t != this.me).forEach(t => this.offerVideo(t));
  }
This will:
- Save your session ID.
- Query permission to start the webcam video and store it in the video list.
- Recalculate the grid layout.
- Initiate the video call with all other participants.
It means that you will initiate the video call when you join the room. The logic to initiate the call is in the offerVideo function. Add the function now:
  private async offerVideo(target: string) {
    const rtc = this.rtcList[target] = this.setupRtcPeerConnection(target);
    const offer = await rtc.createOffer();
    await rtc.setLocalDescription(offer);
    this.ws.send(JSON.stringify({ type: 'video-offer', from: this.me, to: target, sdp: offer }));
  }
This will create an offer from RTCPeerConnection and send it to the target participant as SDP . We don't need to know what is a SDP because RTCPeerConnection will handle it when the target participant receive it. Now we add the handler for video-offer message to the processWebSocketMessage function:
  private processWebSocketMessage(message: { type: string }) {
    switch (message.type) {
      ...
      case 'video-offer': this.processVideoOffer(message as any); break;
      ...
    }
  }
Then we add the processVideoOffer function:
  private async processVideoOffer(message: { from: string, sdp: any }) {
    const target = message.from;
    const rtc = this.setupRtcPeerConnection(target);
    await rtc.setRemoteDescription(new RTCSessionDescription(message.sdp));
    const answer = await rtc.createAnswer();
    await rtc.setLocalDescription(answer);
    this.ws.send(JSON.stringify({ type: 'video-answer', from: this.me, to: target, sdp: answer }));
  }
This will store the video offer and create an answer to send it back to the participant who make the offer. Now we add the handler for video-answer message to the processWebSocketMessage function:
  private processWebSocketMessage(message: { type: string }) {
    switch (message.type) {
      ...
      case 'video-answer': this.processVideoAnswer(message as any); break;
      ...
    }
  }
Then we add the processVideoAnswer function:
  private async processVideoAnswer(message: { from: string, sdp: any }) {
    const target = message.from;
    const rtc = this.rtcList[target];
    await rtc.setRemoteDescription(new RTCSessionDescription(message.sdp));
  }
3. Write the logic to setup RTCPeerConnection
Both the offerVideo function and the processVideoOffer function calls setupRtcPeerConnection to setup the RTCPeerConnection. Add the function like this:
  private rtcList: { [target: string]: RTCPeerConnection } = {};

  private setupRtcPeerConnection(target: string) {
    const url = new URL(location.href);
    const rtc = this.rtcList[target] = new RTCPeerConnection();
    rtc.onicecandidate = ev => this.processRtcIceCandidate(target, ev);
    rtc.ontrack = ev => this.processRtcTrack(target, ev);
    const myVideo = this.videos[this.me];
    myVideo.getTracks().forEach(t => rtc.addTrack(t, myVideo));
    return rtc;
  }

  private processRtcIceCandidate(target: string, ev: RTCPeerConnectionIceEvent) {
    if (ev.candidate) {
      this.ws.send(JSON.stringify({ type: 'ice-candidate', from: this.me, to: target, candidate: ev.candidate }));
    }
  }

  private processRtcTrack(target: string, ev: RTCTrackEvent) {
    this.videos[target] = ev.streams[0];
    this.doLayout();
  }
This will:
- Setup the RTCPeerConnection with necessary handler.
- Send the ICE candidate details to the target recipient.
- If it receives a video track, add it to the videos list so it appear in the UI.
We don't need to know what is an ICE candidate because the RTCPeerConnection will handle it. We need to add a handler for ice-candidate message to the processWebSocketMessage function:
  private processWebSocketMessage(message: { type: string }) {
    switch (message.type) {
      ...
      case 'ice-candidate': this.processIceCandidate(message as any); break;
      ...
    }
  }
Then we add the processIceCandidate function:
  private processIceCandidate(message: { from: string, candidate: any }) {
    const target = message.from;
    this.rtcList[target].addIceCandidate(new RTCIceCandidate(message.candidate));
  }
4. Write the logic to handle participant leaving
We will need to remove the video from the UI if a participant leave. So we need to add the handler for participant-leave message to the processWebSocketMessage function:
  private processWebSocketMessage(message: { type: string }) {
    switch (message.type) {
      ...
      case 'participant-leave': this.processParticipantLeave(message as any); break;
      ...
    }
  }
Then we add the processParticipantLeave function:
  private processParticipantLeave(message: { from: string }) {
    const target = message.from;
    delete this.videos[target];
    delete this.rtcList[target];
    this.doLayout();
  }
This will remove the video from the list if a participant leave.
The video call should be working now. You can try to open 2 browsers and connect to the same room. You should see the browser showing 2 faces of you. If you want to use the video call on another device in the same network, you might need to tweak your firewall to allow incoming connection. If you want to use it on the Internet, you might need to tweak your router to allow port forwarding. It's better to use a STUN server and a TURN server to overcome all these network problems.
Next I will talk about the STUN and the TURN server .